If you have used Travellerspoint's trip mapping tool, you are already aware of the excellent options for choosing different routes between your locations. This is thanks to a partnership with Rome2Rio.
But sometimes even those options aren't enough and you really want to create a custom route. It's a particular problem when you are travelling by boat and there just is no way for us to know what that route might look like. But it can also be a problem when you're hiking in the wilderness or on a camel ride across the desert or travelling in an area less mapped. We have a solution for that. This article will step through how to create your custom route and adjust it to suit your needs.
An important note up front though - you need to be a Supporting Member to use this feature. If you aren't already a Supporting Member please consider it. Not only does it unlock some nice features like this, but it also helps keep this site running!
With that out of the way, here are the steps you'll need to take to create a custom route on your travel map. To show you how it's done, I'll use a real example of a trip I did back in 1997 out to Kapingamarangi Atoll in Micronesia. The map looks sort of fine from a distance, but when you zoom in, it's clear the boat lines are just going directly over land. This can be fixed!
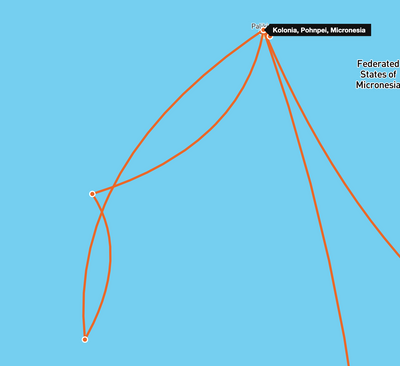
Ugly lines crossing directly over land!
Custom routes to the rescue! Here's how I fixed it:
1. Clicked on the transport icon in between the stops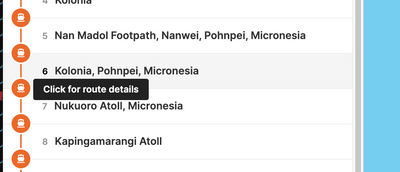
2. Clicked on the route to open the route editor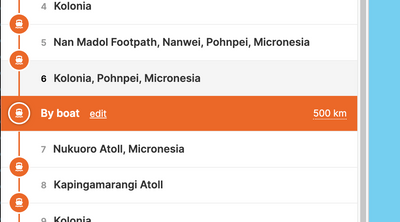
3. Clicked on the "Add" button to add the Custom Route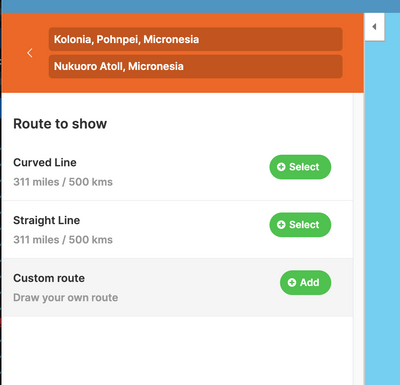
4. Now I can see a new dotted line appear on the map with one handle along the line. 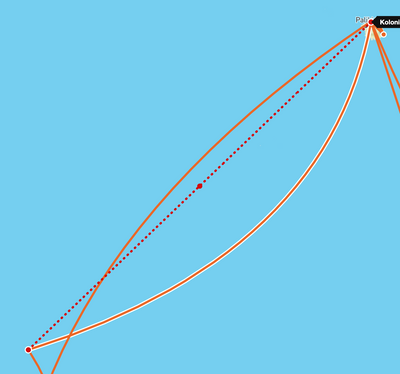
5. That handle is draggable and as soon as it is dragged to its desired position or just clicked on, two new handles will appear to the side of it. 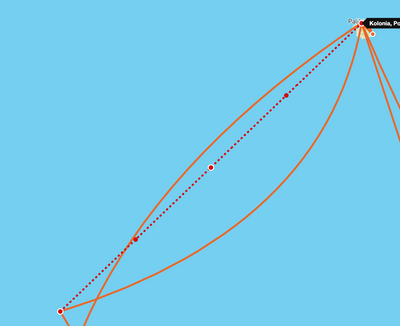
6. I drag a few of these handles to create something other than just a boring straight line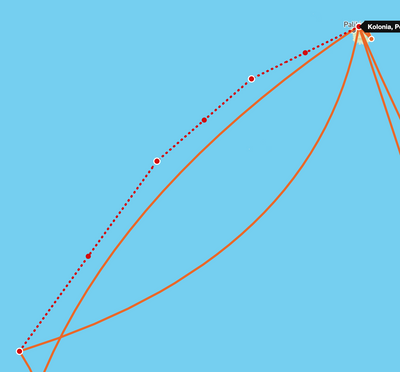
7. Then I zoom into Pohnpei harbour and adjust that line so it actually goes to the ship dock 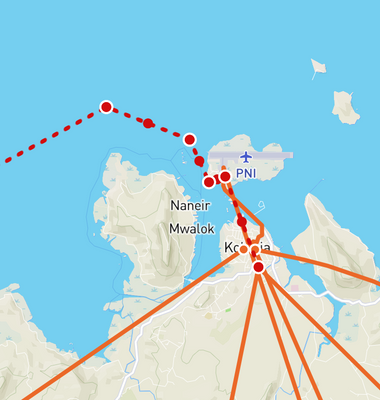
8. When I'm happy with the new route I've drawn, I click the Save button for my custom route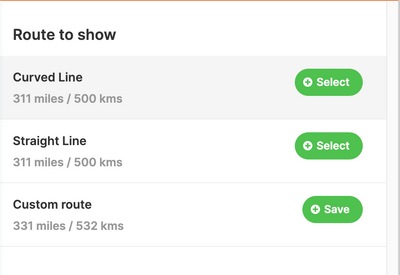
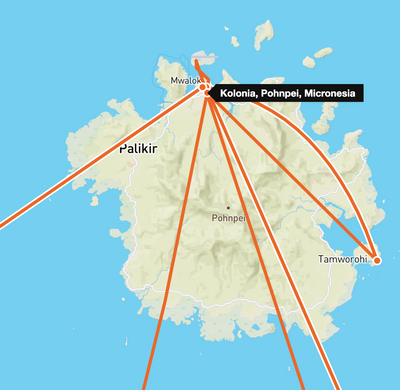
9. I adjusted a couple of other boat routes on the trip as well and then finally I have this much neater result. 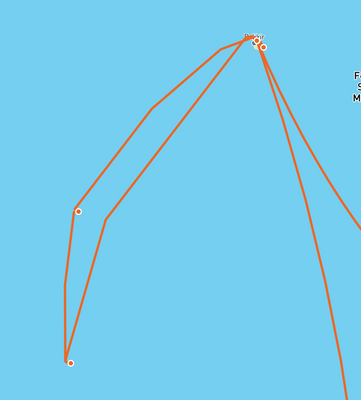
Especially when viewed close up: 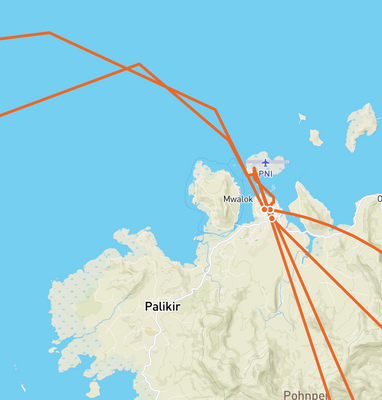
You can see my final Micronesia trip map here if you like.
I'll add just one note of caution - for now at least, when you create a custom route, it is not editable after hitting that Save button. So be certain that you are happy with the route before saving.
Happy mapping. And if you have any questions, feel free to start a thread in our forums
 By Peter
Posted Tue, Apr 23, 2024

Recent in Travellerspoint
- How to sort the trips in your travel map
- How to style your travel map
- How to add custom locations to your trips
- Creating custom routes on your trip map
- How to add tips to your travel blog
- 4 Reasons to Become a Travellerspoint Supporting Member
- Travel blogging
- Custom styles for your embedded travel map
- The Blogging Icons Explained
- Our maps just learned how to stay on the roads